Saturday 1 June 2013
Sold!
Well, we never did take her on the track. A disaster in my personal life followed by a subsequent house move means that she's had to be sold. I've no garage to keep her in, so that's that! So long little Blue!
Sunday 23 December 2012
Fitting Bucket Seats
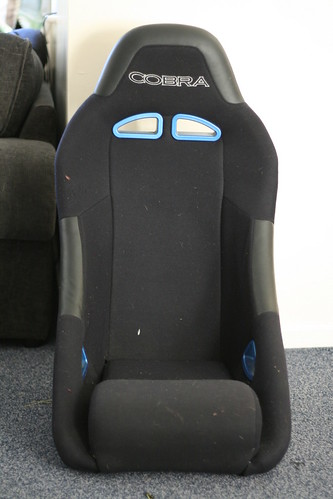
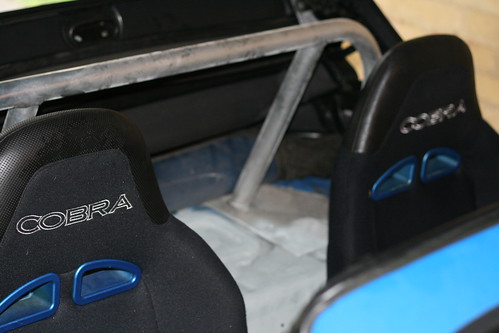
We were lucky enough to get hold of a couple of Cobra bucket seats from a mate for £80 for the pair. They're in reasonable condition and one is much better than the other. The better one is installed as the driver's seat, and the other as the passenger one. In this blog entry, I'm going to talk about how I created my own adapters to fit them in.
I wanted to use the original MX-5 runners for two reasons. Firstly, they are designed to fit into the floor pan perfectly. There are small slots in the floor pan and corresponding steel pins on the runners that mean they have extra strength that I would have to design into any home made version. Secondly, I really wanted the ability to move the seat because +Katy Lee is significantly shorter than I am and she would need to be much nearer the pedals! Plus we also like the idea of other people being able to drive the car without issue.
The Cobra seats have captive nuts in them that are in different positions from the standard MX-5 seats. That's not a surprise of course - these seats can be fitted into a whole bunch of vehicles, so it makes no sense to compromise on the design just to fit one little Japanese sports car.
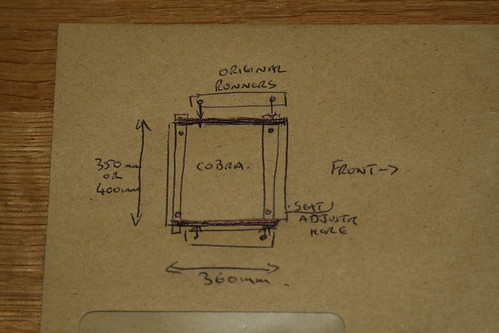
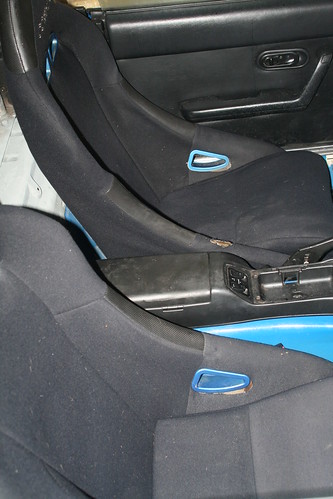
The mounting points are narrower that the standard Mk1 seats, so my adapter had to be wider than the hole in the Cobra. These same mounting points are also further apart as you go front to back on the Cobra, meaning that my adapters would also have to be longer in that dimension.
An important note is that the driver and passenger Mk1 subframes are different widths, meaning that you need to create two different subframes on a similar design. The driver's seat is about 15mm wider. Go figure.
Time for a diagram on the back of an envelope!
Having talked to the MOT man, who said that "the seats just need to be firmly attached", I decided to use 25mm wide by 4mm thick steel strips. You can buy this in 2 metre lengths from B&Q. It barely flexes at the lengths that I'm using, so I consider this "firmly attached" when bolted together firmly.
To make these brackets, I used:

(Note: the two black bolts are the ones that came with the seat, and the other with them is one of those that holds the standard MX-5 seat to the frame. You won't need those and they are now so much scrap metal.)
And tools (that I already had to hand):
To make the bracket I cut the steel into the following strips:
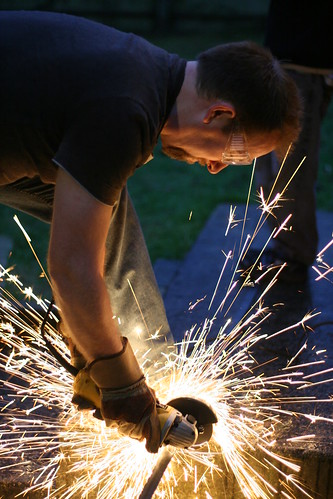
I love using my angle grinder way too much. Here I am using my eight year old son as ballast!
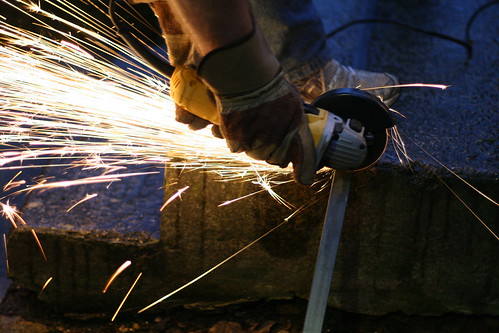
Mmmm. Sparks. :-)
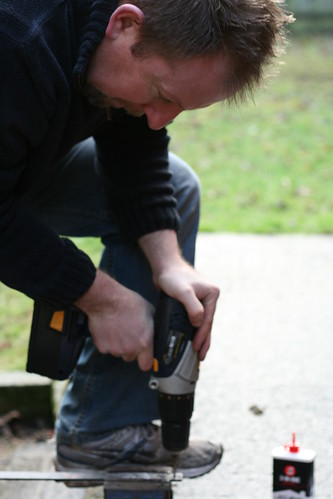
The holes were then measured ("measure twice, cut once" as my Grandpa used to say!) and drilled. The trick to drilling thick steel is to use a slow speed, lots of steady pressure and plenty of lubrication. In the picture, I'm drilling out a pilot hole using my 4mm metal cutting drill bit. The only drill that I have with sufficiently adjustable speeds is my 18v cordless. I had to recharge it a few times to get the complete project drilled out... perhaps it's time to upgrade to a DeWalt...?! Hmm, my Birthday is in March...
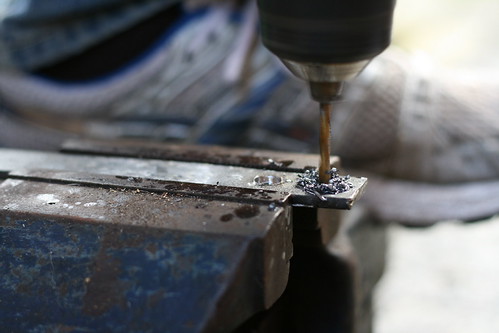
The 4mm pilot was then drilled out with a 10mm bit. You'll notice the can of 3in1. It's perfect lubrication for this work. I found that three squirts throughout the process was sufficient to cover a hole, but your mileage will vary with drill quality and speeds.
Another nice feature of the 3in1 as lubrication is that it binds the swarf together, making it easier to pick up and keep out of doggie paws.
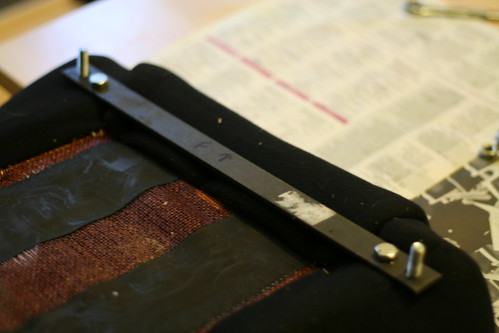
After that it was really a simple matter of fitting the brackets together. The front and back cross members were bolted into the captive nuts first (with bolts poking through to receive the side pieces).
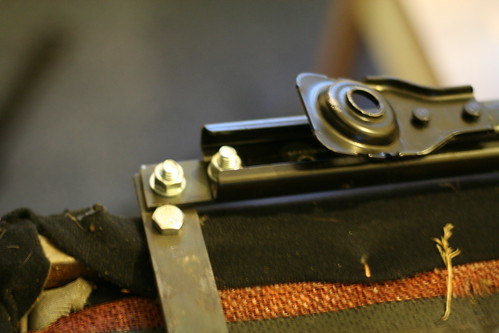
The finished bolts, similar on each corner. On the front, I went through all three layers with one of the longer bolts, while at the back I used shorter ones as shown here. There is some of clearance, so you arguably could use the longer bolts all round. Note that I have tried to ensure that the bolt 'tail' and the nuts are underneath so that there is less poking up to catch anything on:
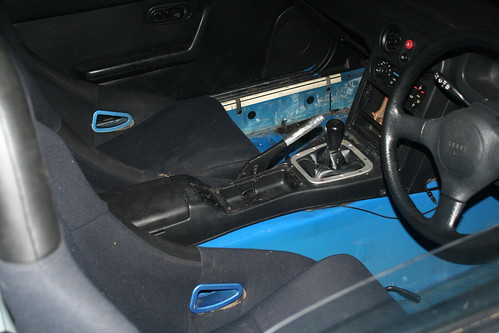
Here are the seats mounted in the car. The photos aren't great because it was raining outside, there is only limited space in the garage and I had the wrong lens on the camera!
All done! Feel free to comment and or ask questions as always.
I wanted to use the original MX-5 runners for two reasons. Firstly, they are designed to fit into the floor pan perfectly. There are small slots in the floor pan and corresponding steel pins on the runners that mean they have extra strength that I would have to design into any home made version. Secondly, I really wanted the ability to move the seat because +Katy Lee is significantly shorter than I am and she would need to be much nearer the pedals! Plus we also like the idea of other people being able to drive the car without issue.
The Cobra seats have captive nuts in them that are in different positions from the standard MX-5 seats. That's not a surprise of course - these seats can be fitted into a whole bunch of vehicles, so it makes no sense to compromise on the design just to fit one little Japanese sports car.
The mounting points are narrower that the standard Mk1 seats, so my adapter had to be wider than the hole in the Cobra. These same mounting points are also further apart as you go front to back on the Cobra, meaning that my adapters would also have to be longer in that dimension.
An important note is that the driver and passenger Mk1 subframes are different widths, meaning that you need to create two different subframes on a similar design. The driver's seat is about 15mm wider. Go figure.
Time for a diagram on the back of an envelope!
Having talked to the MOT man, who said that "the seats just need to be firmly attached", I decided to use 25mm wide by 4mm thick steel strips. You can buy this in 2 metre lengths from B&Q. It barely flexes at the lengths that I'm using, so I consider this "firmly attached" when bolted together firmly.
To make these brackets, I used:
- 2 x Steel Strips (L)2m x (W)25mm x (T)4mm [B&Q part number: 3232630800003] @ £10.60
- 1 x Pack 10 of Bolts (W)M8 x (L)20mm [B&Q part number: 5020789852831] @ £2.48
- 1 x Pack 10 of Bolts (W)M8 x (L)25mm [B&Q part number: 5020789852855] @ £2.49
Total parts cost: £26.17
(Note: the two black bolts are the ones that came with the seat, and the other with them is one of those that holds the standard MX-5 seat to the frame. You won't need those and they are now so much scrap metal.)
And tools (that I already had to hand):
- 1 x 4mm metal drill bit
- 1 x 10mm metal drill bit
- 1 x variable speed drill
- 1 x angle grinder and cutting disk
- 1 x 3in1 oil as drilling lubricant
To make the bracket I cut the steel into the following strips:
- 4 x 360mm (Front to back, both seats)
- 2 x 400mm (Drivers seat, side to side)
- 2 x 350mm (Passenger seat, side to side)
I love using my angle grinder way too much. Here I am using my eight year old son as ballast!
Mmmm. Sparks. :-)
The holes were then measured ("measure twice, cut once" as my Grandpa used to say!) and drilled. The trick to drilling thick steel is to use a slow speed, lots of steady pressure and plenty of lubrication. In the picture, I'm drilling out a pilot hole using my 4mm metal cutting drill bit. The only drill that I have with sufficiently adjustable speeds is my 18v cordless. I had to recharge it a few times to get the complete project drilled out... perhaps it's time to upgrade to a DeWalt...?! Hmm, my Birthday is in March...
The 4mm pilot was then drilled out with a 10mm bit. You'll notice the can of 3in1. It's perfect lubrication for this work. I found that three squirts throughout the process was sufficient to cover a hole, but your mileage will vary with drill quality and speeds.
Another nice feature of the 3in1 as lubrication is that it binds the swarf together, making it easier to pick up and keep out of doggie paws.
After that it was really a simple matter of fitting the brackets together. The front and back cross members were bolted into the captive nuts first (with bolts poking through to receive the side pieces).
The finished bolts, similar on each corner. On the front, I went through all three layers with one of the longer bolts, while at the back I used shorter ones as shown here. There is some of clearance, so you arguably could use the longer bolts all round. Note that I have tried to ensure that the bolt 'tail' and the nuts are underneath so that there is less poking up to catch anything on:
Here are the seats mounted in the car. The photos aren't great because it was raining outside, there is only limited space in the garage and I had the wrong lens on the camera!
All done! Feel free to comment and or ask questions as always.
Sunday 5 August 2012
Woah there!
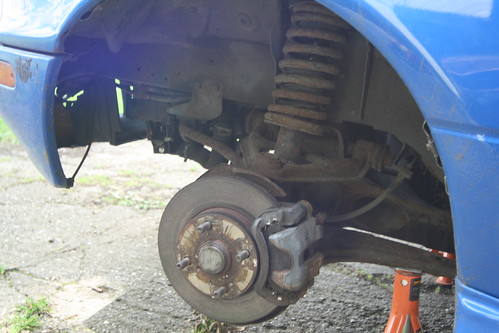
The brakes on little blue were shocking. Not just bad, but awful to the point where you had to plan way ahead to stop at a junction. This is the real reason we've not done any track days with the car yet, and why I've hardly done any road miles in her. Well, that has changed. We spent yesterday fitting new discs and pads all round. It's not a terrible job once you get the feel of it.
Want to see some photos?
Front Brakes
Prior to starting, I jacked up the car and put her on two axle stands. Then removed the road wheels from both sides. I figured I'd like to be able to see the current set up in case I got lost somewhere, so I did one side at a time.
Initial set up:
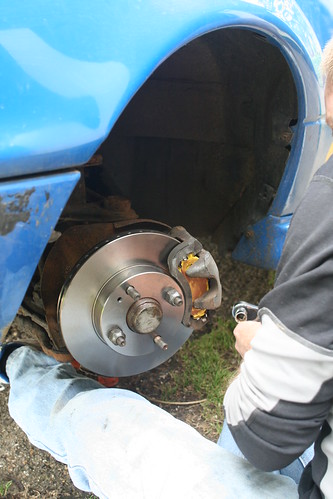
Entire caliper removed to get to the disc, disc removed. Box crate deployed to hold the caliper so that the brake pipe isn't damaged:

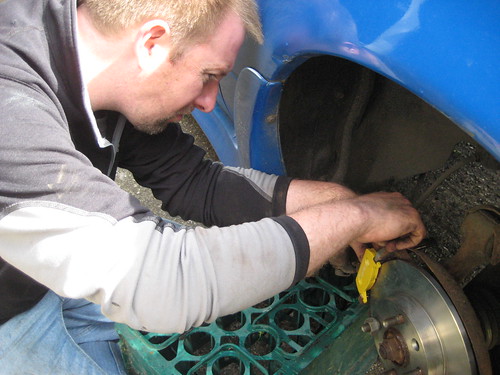
Giving everything a little clean with a wire brush: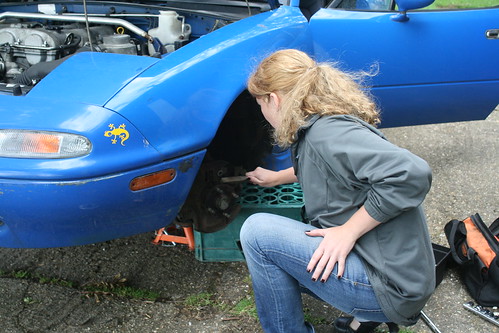
Fitting the pads: I went for EBC Yellow Stuff. :-)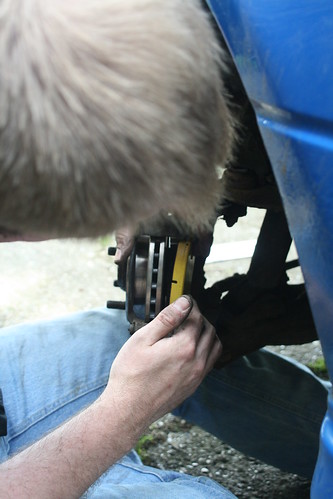
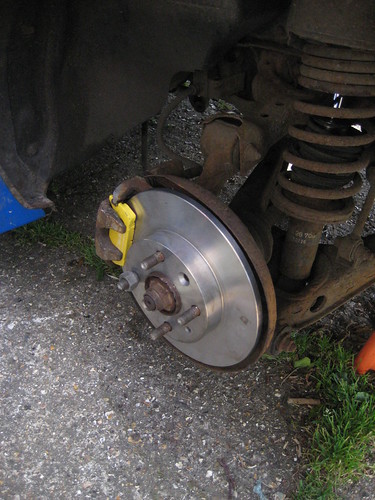
And the final setup on the front. Note the disc being held rigidly in place with wheel nuts while the caliper and pads were fitted.
Rear brakes
The rear brakes have an entirely different caliper, pad and disc configuration to the front.
Jacking the car.... in the pouring rain. Not pleasant!
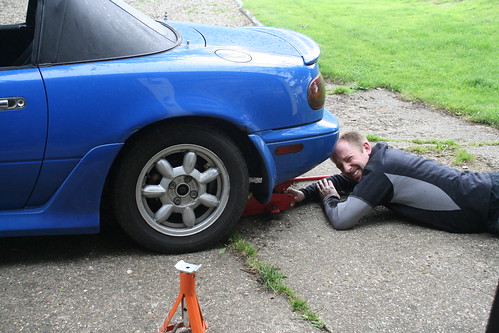
Trying to find the correct alankey size for the manual adjuster. (It's 4mm by the way). The adjuster will do its best to fall out. We spend twenty minutes looking for it once it had done so. Doh.
Folding the caliper up and out of the way. It's tough work because there is a huge amount of spring in the handbrake cable: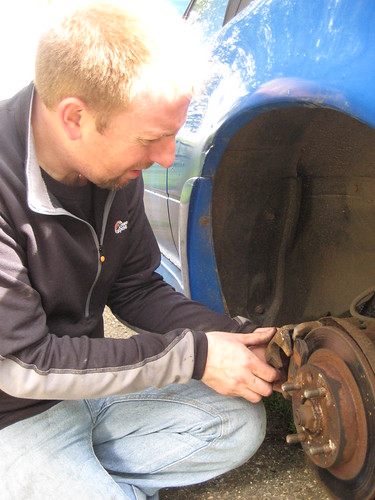
Pads going in:
And finished:
Want to see some photos?
Front Brakes
Prior to starting, I jacked up the car and put her on two axle stands. Then removed the road wheels from both sides. I figured I'd like to be able to see the current set up in case I got lost somewhere, so I did one side at a time.
Initial set up:
Entire caliper removed to get to the disc, disc removed. Box crate deployed to hold the caliper so that the brake pipe isn't damaged:
Giving everything a little clean with a wire brush:
Fitting the pads: I went for EBC Yellow Stuff. :-)
And the final setup on the front. Note the disc being held rigidly in place with wheel nuts while the caliper and pads were fitted.
Rear brakes
The rear brakes have an entirely different caliper, pad and disc configuration to the front.
Jacking the car.... in the pouring rain. Not pleasant!
Trying to find the correct alankey size for the manual adjuster. (It's 4mm by the way). The adjuster will do its best to fall out. We spend twenty minutes looking for it once it had done so. Doh.
Folding the caliper up and out of the way. It's tough work because there is a huge amount of spring in the handbrake cable:
Pads going in:
And finished:
Friday 22 June 2012
Watertight at Last!
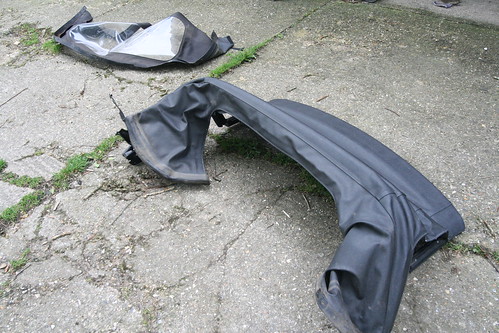
One of the problems that our car has suffered with is a damaged hood. The hood itself was fine - in fact, arguably the best hood out of those one all our cars - but the plastic window had become detached from the surround. I suspect that the previous owner had been dropping the roof without unzipping the window...
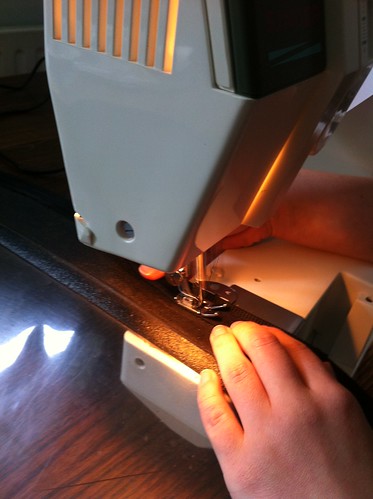
Having removed the original roof carefully, I zipped out the window section of the replacement roof and then realised that the zips are incompatible. We were pretty annoyed for a while until we decided to unpick the zip from the original window and resew it onto the replacement.
Unpicking:
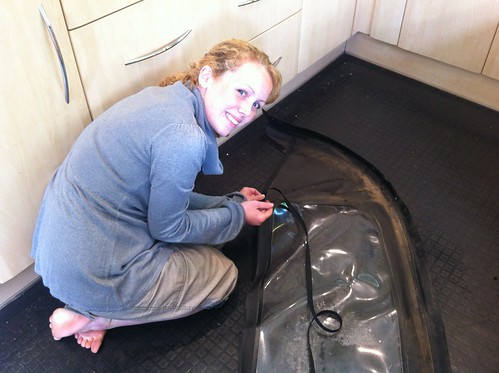
Ready to sew:
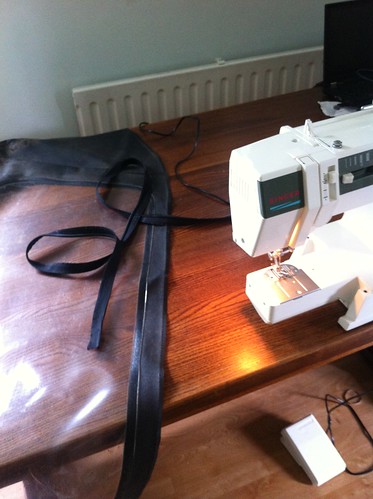
Pinned in place:
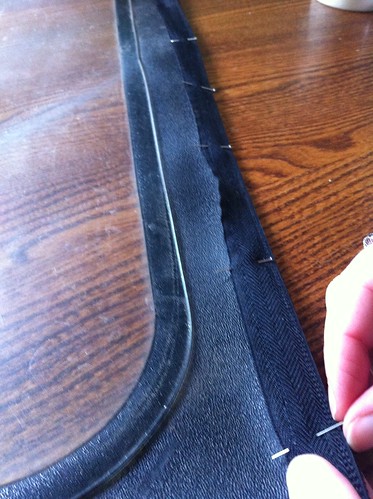
Full on sewing machine action:
We wanted a new hood. An bit of canny eBay work got us an entire roof including frame for £28. We had to pick it up ourselves, but we turned this into a decent weekend away, so all good. The replacement roof was described as 'not A1, but serviceable'. It has a pretty major rip where the rain rail hold it in, but most importantly the zip out window section was perfect. See where we're going here? :-)
You can't just zip in the new window - you have to remove the roof first. It's not that tricky to remove as we discovered. To undo: 14 x 10mm nuts around the rain rail (bear in mind we'd already stripped and binned the carpet), then strip back the seat belt tower plastic cover and undo 6 x 12mm nuts (3 per side). The roof will be out fairly easily. The Haynes manual actually totally misses out the rain rail part! Fail.
Here we are with the roof removed:
Here we are with the roof removed:
Having removed the original roof carefully, I zipped out the window section of the replacement roof and then realised that the zips are incompatible. We were pretty annoyed for a while until we decided to unpick the zip from the original window and resew it onto the replacement.
I left the girly sewing stuff to Katy. ;-)
Unpicking:
Ready to sew:
Pinned in place:
Full on sewing machine action:
This took some time, but seems to be pretty successful, I'm pleased to report.
I cleaned up the rails quickly. Ideally, they'd be repainted, but we needed to crack on. A task for another day.

After that we had to wait until a few major rain showers had passed before rolling the car out of the garage to give us space to pop the roof back on. It's not the easiest task in the world to re-seat the roof into the rain rail and then attach the metal cover rail in place. Katy took this task in hand with remarkable skill. I'd never have done it.

And here you are, a totally fixed and awesome roof:
Katy's top tips: drop the roof into place, attach a couple of the 12mm bolts on each side, then raise the roof. Leave the window unzipped so you can reach inside and out as you need to. You will need to have someone (my job!) hold the roof still at various stages of fold so that you get the correct tension to allow you to feed it in.
Here she is refixing the metal rail on her side of the car:
And here you are, a totally fixed and awesome roof:
Monday 21 May 2012
When it rains...
...we'll be able to see. I finally replaced the refurbished wipers this evening. I also changed the gear knob from the clunky broken one that was there (see previous pictures) to a much nicer, neater standard Mk1 knob that I got from eBay for £6 delivered.
Then I had to take it for a quick spin of course, just to test it out you see. Ahem.
Next major job: the brakes.
Second major job: a 'new' hood.
Then I had to take it for a quick spin of course, just to test it out you see. Ahem.
Next major job: the brakes.
Second major job: a 'new' hood.
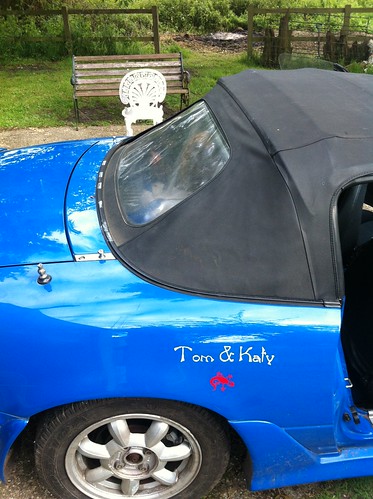
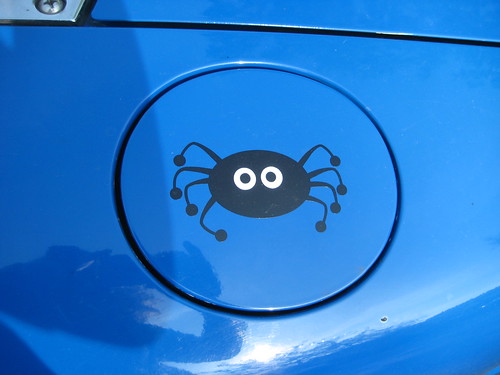
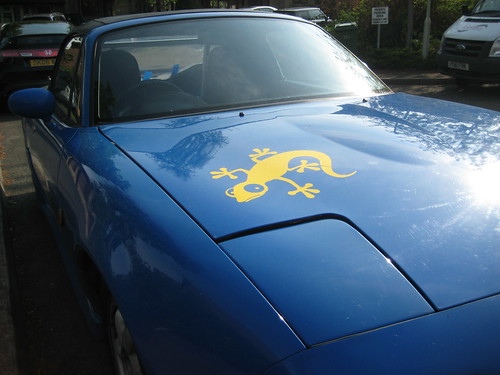
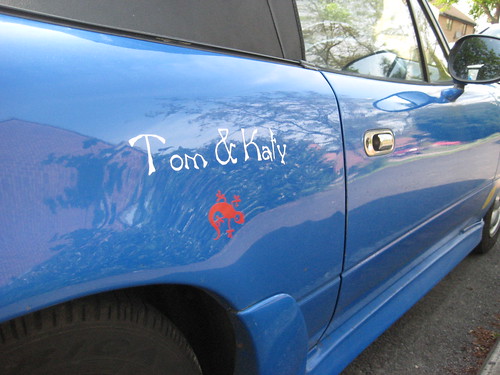
Stickers!
Bluey (no, I know, it's not original but the name seems to have stuck!) was looking a little drab and sad-looking with her scratches and scrapes and certainly not interesting enough for a race car. We (Tom) found the wonderful website Hippy Motors and ordered a large number of stickers, mostly for Bluey but a few for Poppy and Scarlett each.
One day, while waiting for someone to come pick up some bits that they'd bought off us on eBay, we got rather sticker happy. See below for the outcome - I love it!
Look out for us!
One day, while waiting for someone to come pick up some bits that they'd bought off us on eBay, we got rather sticker happy. See below for the outcome - I love it!
Look out for us!
Tuesday 15 May 2012
Improved - Not Perfect
So, following the crappy smokey video that we posted on YouTube (see below), the new idle is much, much improved. She is using a little oil, and smokes a bit blue on start. I suspect that it's the usual valve stem oil seal problem that older cars tend to have. The mechanic said not to worry, so we won't. :-)
This is not an exciting video - which is nice. Just a gentle idle. More videos to come.
This is not an exciting video - which is nice. Just a gentle idle. More videos to come.
Subscribe to:
Posts (Atom)